This is my no‑mixer pesto cheese salt bread recipe!! I am so proud of this haha. Ever since salt bread went viral, I knew I had to give it a twist, and honestly, this version has completely stolen my heart. Imagine buttery layers wrapped around gooey cheese and nutty, garlicky fresh pesto, baked until golden, crisp on the outside, soft and pillowy inside. Every bite is cheesy, salty, herby perfection.
The best part? You don’t need a mixer, fancy tools, or professional bread‑making skills. The dough is simple, smooth, and surprisingly easy to work with. It’s one of those bakes that looks bakery‑level impressive but only needs a little patience, resting and love. Oh, and a hungry belly because it won’t take long to finish.
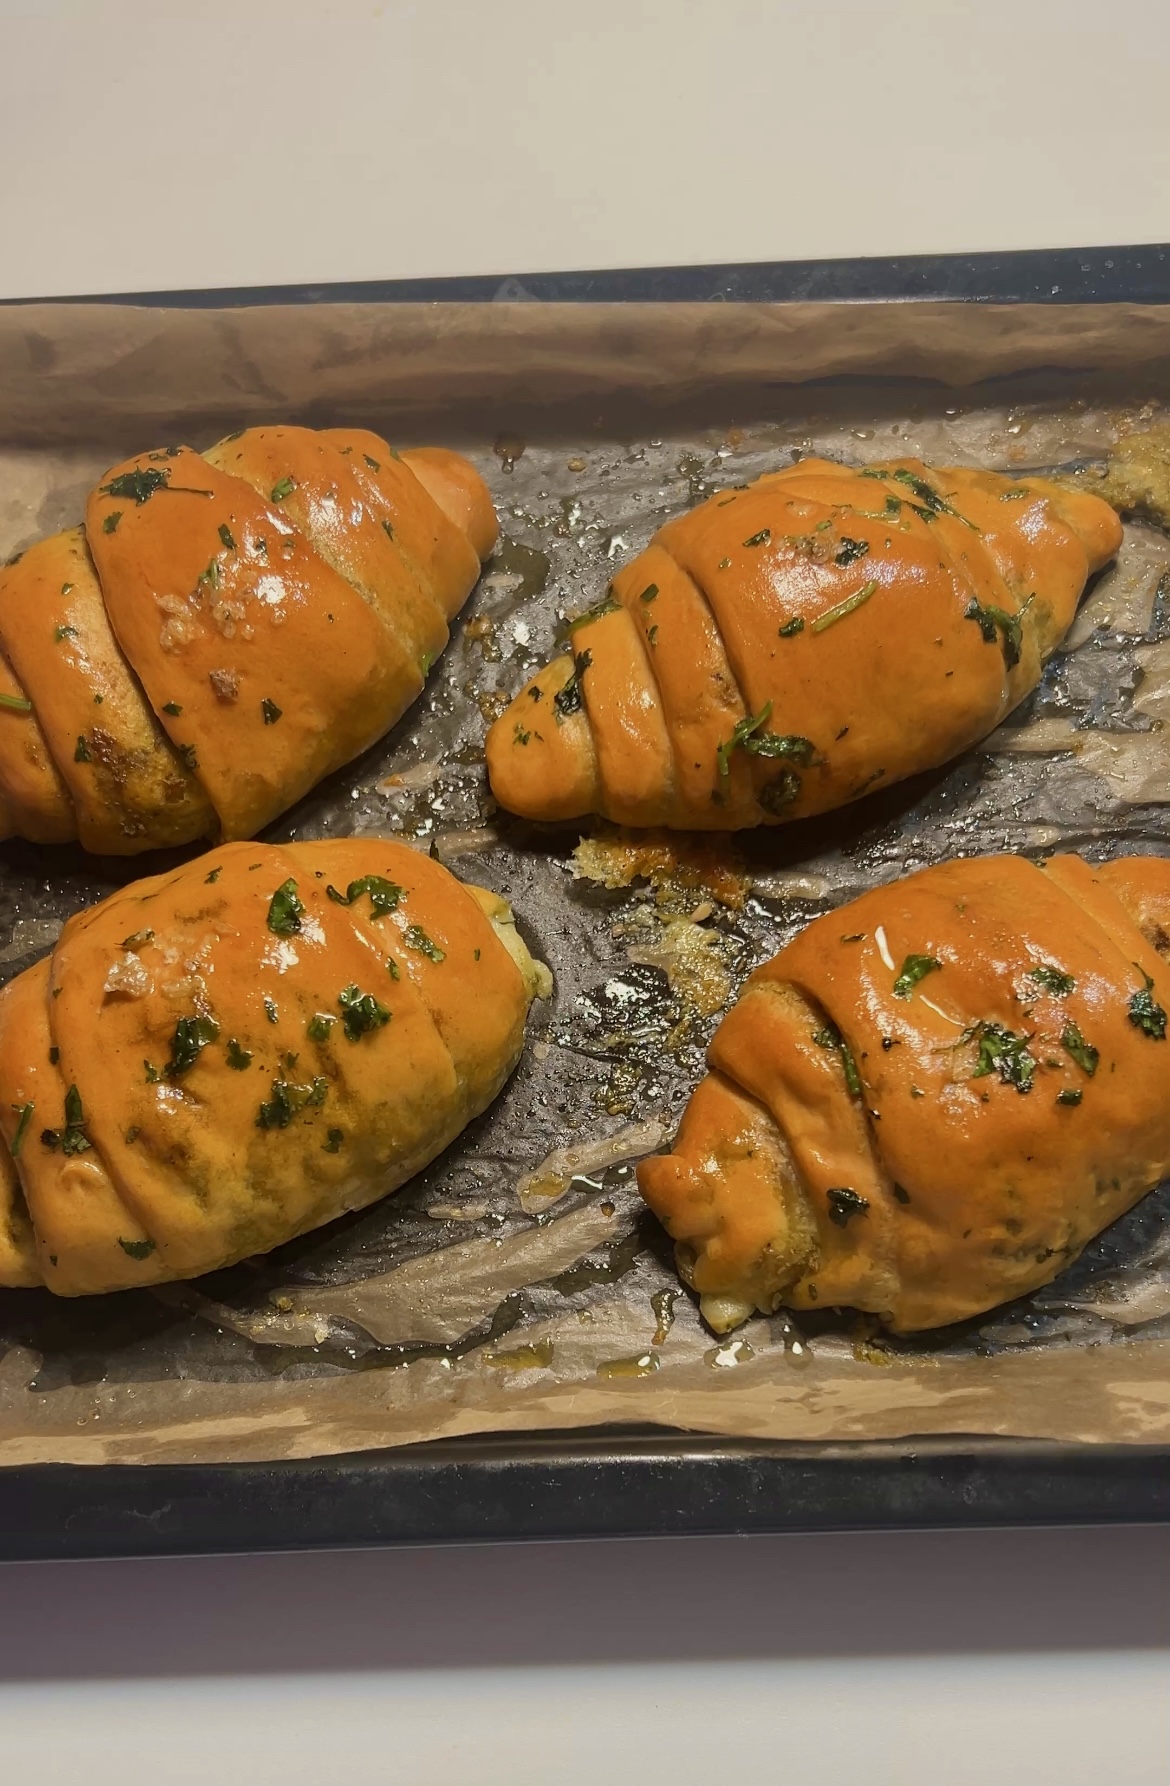
The combination of butter, pesto, and cheese gives it the most addictive taste and texture. Think of it as a cross between garlic bread, a soft bun, and a croissant but easier!
Why you will love this recipe-
- No mixer required – you can knead this with your hands and still get perfect results.
- Soft, airy interior – cake flour in the blend gives that melt‑in‑mouth texture.
- Crisp buttery base – created by the natural escape of butter during baking.
- Cheesy, herby aroma – the smell alone will make your kitchen feel like heaven.
- Versatile – serve it for brunch, dinner, or as an indulgent midnight snack.
Some Things to Keep in Mind for the Best Results
- Use cake flour in the blend. This gives the signature soft, silky crumb that sets salt bread apart. It helps the dough stay fluffy yet structured enough to hold the buttery filling. If you can’t find cake flour, combine all-purpose and a bit of cornstarch, still works beautifully!
- Leave gaps in roll corners. Don’t seal the ends too tightly as those little openings let the butter ooze out slightly as it bakes, frying the bottom into that crispy golden crust everyone loves.
- Windowpane test: After kneading, stretch a small piece of dough ,if you can see light through it without it tearing immediately, it’s ready! A slight graininess is fine since we’re going for a tender, not chewy, texture. Check the video i attached below.
- Skip parchment paper if you can. If you’re using a non-stick tray, bake directly on it. This helps achieve that crunchy base while keeping the inside soft and buttery.
- Adjust oven settings to your setup. Every oven behaves differently and mine only uses top heating, so I preheat to the highest temperature, then reduce it for even baking. I’ve shared detailed settings in the oven instructions below.
- Watch your dough, not the clock. Temperature and humidity can affect proofing time. The dough should double in size and feel airy when lightly pressed then that’s your go‑ahead to bake.
- Video references. I’ve added clips of the shaping and folding process below , following visually makes it so much easier, especially for beginners.
Best Enjoyed When
This bread is best enjoyed fresh out of the oven — warm, soft, and aromatic. The butter settles beautifully as it cools, so give it 10–15 minutes of rest after baking before digging in (if you can wait that long!).
Here are some of my favorite ways to eat it:
- Warm for breakfast: Pair it with coffee or tea , the richness of butter and pesto is a perfect contrast.
- With soup: Especially creamy tomato or mushroom soup! the bread acts like a cheesy dipper.
- Brunch plate: Serve with eggs and salad for a filling, pretty brunch spread.
- Snack time: Reheat in an air fryer for 2–3 minutes , it crisps up again perfectly!
- Gourmet base: Slice open and stuff with mozzarella and roasted veggies for a homemade sandwich twist. Its so good.
However you choose to enjoy it, one thing’s for sure that this bread doesn’t last long. It’s one of those recipes that disappear almost as soon as it hits the table.
NOTES
- The dough needs to double in size like this after resting. And this part is very satisfying.
2. WINDOWPANE TEST- make your dough reach this consistency and transparency. Keep kneading it until it can be stretched into a translucent dough.
3. The process of rolling, shaping and filling the dough balls. Read instructions in recipe for detailed steps.
Pesto Cheese Salt Bread
Ingredients
Method
- Top Coil only oven like mine- 250 degrees initial bake for 5-7 minutes till lightly golden. Then 235 for 12-15 mins till golden brown.Standard ovens- 240 degrees initial, then drop to 200 degrees.
- Mix flours + sugar + salt + yeast.
- Add warm water + cold milk. Here you are aiming to achieve a shaggy sticky dough. There should be no flour that is left dry. Don't over mix it; once all the flour is wet cover the dough and let it rest for 20 mins.
- After 20 mins, add softened butter and start kneading the dough again.
- Slap-and-fold the dough continuously. We want it to be smooth and pass the window pane test. The window pane test is when your dough can stretch out into a translucent thin film without breaking. Keep kneading the dough till you reach this level; by hand it should take you 20-30 mins. With a mixer, you may reach this point within 15 mins at medium speed.
- After the dough is perfect, we will let it rest again for 1 hour.
- If your kitchen is cold like mine, place a pot with boiling water on the bottom oven rack and place the dough covered on middle rack. 60 min until 1.5-2x bigger.
- After 1 hour, the dough should be doubled in size. De-gas the dough by punching it in. This part is so satisfying.
- Smoothen dough out and divide it into 6 equal pieces (around 70g).
- Shape each piece into a tear drop shape. Then elongate it into almost a carrot shape. Now comes the key step: hold your rolling pin horizontally over only the wide top end and roll just that top half into an upside-down triangle shape, about 15 inches total length with the triangle base 4 inches wide at the top-the bottom stays as a 2-inch wide rectangle.
- Spread 1 spoon of pesto thinly across this flattened triangle surface, add 1 piece of butter at the top and the mozzarella cheese next to it. Starting from the top, roll tightly toward the point like making a sushi roll, pinch the seam closed at the end, but leave small gaps at both ends so butter can escape during baking.
- Place tail end side down on your parchment-lined metal pan, spacing rolls 4-5cm apart. Repeat for all 6 rolls.
- Now let them rest again for 15-20 minutes. Add the hot water pot in the oven below the rolls again.
- After 20 mins, start preheating your oven to 250 degree celsius. (this is for my small, top coil heat only oven. For standard oven, heat it to 240 degrees)
- Sprinkle flaky salt on your rolls and spray them generously with water. They should be glistening at this point. This water will create steam for them to crispen perfectly.
- Place pan in the middle rack at 250 degrees for 5-7 minutes till it becomes lightly golden.
- After this, drop the tempetaure to 235 degrees for 12-15 minutes till perfectly golden brown.
- For standard ovens: Preheat 240°C → 5-7 mins → drop 200°C → 12 mins.
- Take it out of oven when its perfectly golden brown. Brush some cilantro butter on it and enjoy.
Leave a Reply